How to configure Cheque Printing for any Bank in Tally ERP 9
Earlier, Tally user had to configure cheque dimensions manually for printing the Cheque Leafs using the software. But, now Tally ERP 9 has came up with predefined Cheque Formats for almost all the Banks available in the market.
You do not need to worry about configuration of Cheque Printing with the exact dimensions. In order to auto configure the Cheque of your Bank, your computer must be connected with the Internet to access the available Banks at your Country and concerned the Cheque Formats. So, you do not need to issue the Hand written Cheques to your business people. After you have recorded the Payment Voucher you can take the Print out of the worth payment in your Cheque Leaf.
You can configure the Cheque Printing for your Bank Ledger if the ledger account is of Bank Accounts or Bank OD A/c groups. In the Ledger Creation or Ledger Alteration screen
- Select Yes for Set/Alter Bank Details option.
- In the Bank Details screen select appropriate Bank Name from the List of Banks for Select your Bank option.
- Under General Configuration section select Yes for Set Cheque Printing Configuration option.
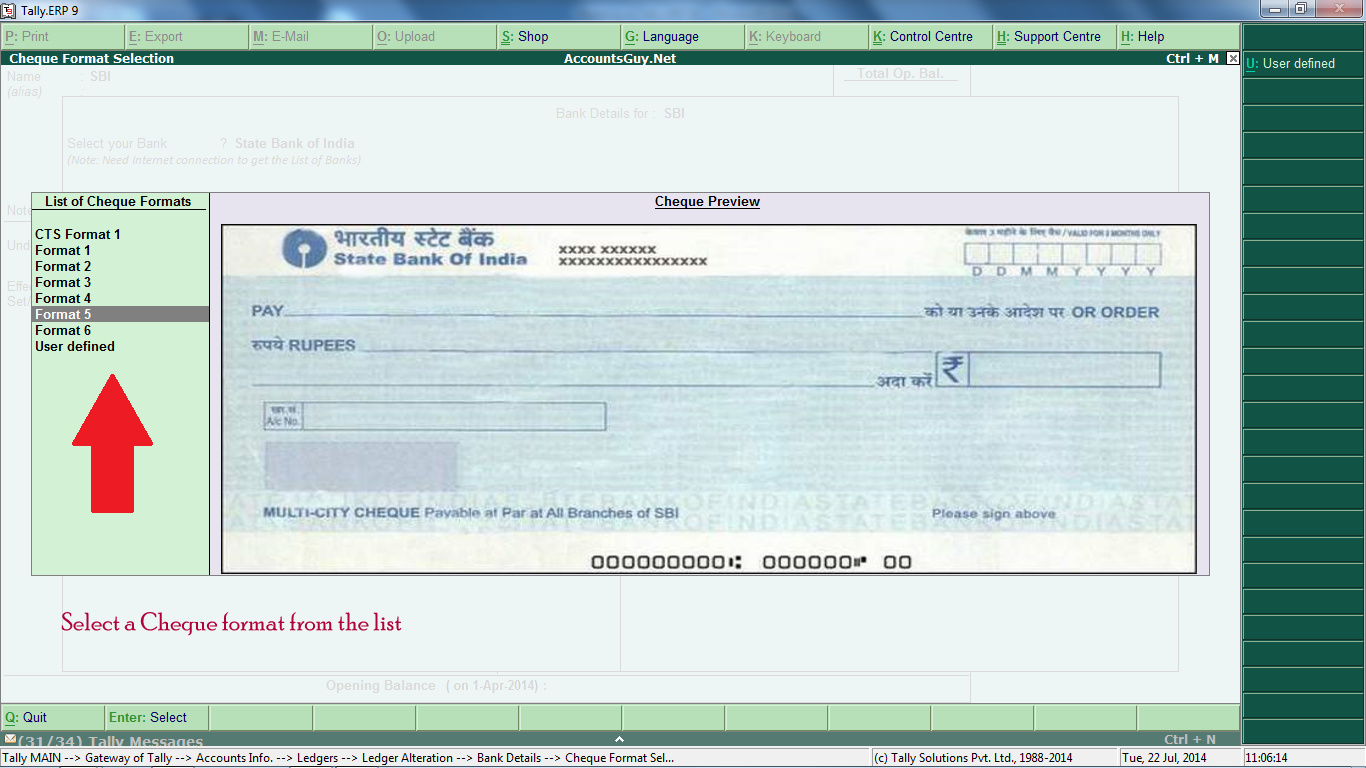
- Then you will see the Cheque Format Selection screen where you will see the specimen of the Cheque based on the selection of your Bank for Select your Bank option in the earlier screen.
If you see the different Cheque Preview just choose the appropriate format from the List of Cheque Formats in the left side. If you do not see the exact cheque specimen then you need to go with User defined format to manually configure the Cheque printing dimensions. Accept all the Bank screens and save the Ledger Creation and Ledger Alteration screen.
When you select the Bank Ledger which is configured for Cheque Printing you can print on the Cheque after you have recorded the Payment transaction. It is better to take print on white paper and check it before printing on the Cheque Leaf.

